Building a Task List App: RecyclerView, Room, and Fragment
This is a great combination of core Android topics. To demonstrate RecyclerView, Room, and Fragment working together, we will build a simple Task List App.
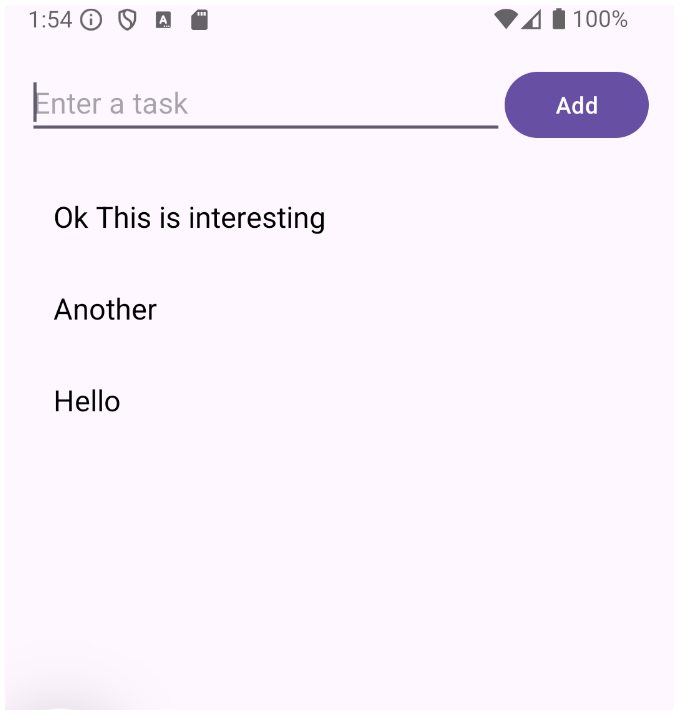
The app will use a Fragment to display a user interface, Room to save tasks to a local SQLite database, and a RecyclerView to display that list of tasks.
Step 1: Add Dependencies (build.gradle)
First, you need to add the Room dependencies. Open your app-level build.gradle file and add these to your dependencies block:
dependencies {
    // ... other dependencies

    def room_version = "2.6.1"
    implementation "androidx.room:room-runtime:$room_version"
    annotationProcessor "androidx.room:room-compiler:$room_version"

    // Lifecycle components for LiveData/ViewModel
    implementation "androidx.lifecycle:lifecycle-viewmodel:2.6.2"
    implementation "androidx.lifecycle:lifecycle-livedata:2.6.2"
}
Step 2: The Data Layer (Room)
Create a new package called data (optional, but good for organization) and add these three files.
1. Task.java (The Entity)
This represents a table in your database.
package com.example.week52026_recyclerview_room_fragment;

import androidx.room.Entity;
import androidx.room.PrimaryKey;

@Entity(tableName = "task_table")
public class Task {
    @PrimaryKey(autoGenerate = true)
    private int id;
    private String taskName;

    public Task(String taskName) {
        this.taskName = taskName;
    }

    public int getId() { return id; }
    public void setId(int id) { this.id = id; }

    public String getTaskName() { return taskName; }
    public void setTaskName(String taskName) { this.taskName = taskName; }
}
2. TaskDao.java (The Data Access Object)
This defines how you read/write to the database.
package com.example.week52026_recyclerview_room_fragment;

import androidx.lifecycle.LiveData;
import androidx.room.Dao;
import androidx.room.Insert;
import androidx.room.Query;
import java.util.List;

@Dao
public interface TaskDao {
    @Insert
    void insert(Task task);

    // LiveData automatically updates the UI when the database changes
    @Query("SELECT * FROM task_table ORDER BY id DESC")
    LiveData<List<Task>> getAllTasks();
}
3. AppDatabase.java (The Database)
This holds the database and serves as the main access point.
package com.example.week52026_recyclerview_room_fragment;

import android.content.Context;
import androidx.room.Database;
import androidx.room.Room;
import androidx.room.RoomDatabase;
import java.util.concurrent.ExecutorService;
import java.util.concurrent.Executors;

@Database(entities = {Task.class}, version = 1, exportSchema = false)
public abstract class AppDatabase extends RoomDatabase {

    public abstract TaskDao taskDao();
    private static volatile AppDatabase INSTANCE;

    // Executor service to run database operations on a background thread
    public static final ExecutorService databaseWriteExecutor = Executors.newFixedThreadPool(4);

    public static AppDatabase getDatabase(final Context context) {
        if (INSTANCE == null) {
            synchronized (AppDatabase.class) {
                if (INSTANCE == null) {
                    INSTANCE = Room.databaseBuilder(context.getApplicationContext(),
                            AppDatabase.class, "task_database")
                            .build();
                }
            }
        }
        return INSTANCE;
    }
}
Step 3: The UI Layer (RecyclerView Adapter)
1. item_task.xml (Layout for a single row)
Create this in res/layout/.
<?xml version="1.0" encoding="utf-8"?>
<LinearLayout xmlns:android="http://schemas.android.com/apk/res/android"
    android:layout_width="match_parent"
    android:layout_height="wrap_content"
    android:padding="16dp"
    android:orientation="vertical">

    <TextView
        android:id="@+id/textViewTaskName"
        android:layout_width="wrap_content"
        android:layout_height="wrap_content"
        android:textSize="18sp"
        android:textColor="@android:color/black"/>
</LinearLayout>
2. TaskAdapter.java (The Adapter)
package com.example.week52026_recyclerview_room_fragment;

import android.view.LayoutInflater;
import android.view.View;
import android.view.ViewGroup;
import android.widget.TextView;
import androidx.annotation.NonNull;
import androidx.recyclerview.widget.RecyclerView;
import java.util.ArrayList;
import java.util.List;

public class TaskAdapter extends RecyclerView.Adapter<TaskAdapter.TaskViewHolder> {

    private List<Task> tasks = new ArrayList<>();

    @NonNull
    @Override
    public TaskViewHolder onCreateViewHolder(@NonNull ViewGroup parent, int viewType) {
        View view = LayoutInflater.from(parent.getContext())
                .inflate(R.layout.item_task, parent, false);
        return new TaskViewHolder(view);
    }

    @Override
    public void onBindViewHolder(@NonNull TaskViewHolder holder, int position) {
        Task currentTask = tasks.get(position);
        holder.textViewTaskName.setText(currentTask.getTaskName());
    }

    @Override
    public int getItemCount() {
        return tasks.size();
    }

    // Call this when database data changes
    public void setTasks(List<Task> tasks) {
        this.tasks = tasks;
        notifyDataSetChanged();
    }

    class TaskViewHolder extends RecyclerView.ViewHolder {
        private TextView textViewTaskName;

        public TaskViewHolder(View itemView) {
            super(itemView);
            textViewTaskName = itemView.findViewById(R.id.textViewTaskName);
        }
    }
}
Step 4: The Fragment
1. fragment_task.xml (Layout for the Fragment)
Create this in res/layout/.
<?xml version="1.0" encoding="utf-8"?>
<LinearLayout xmlns:android="http://schemas.android.com/apk/res/android"
    android:layout_width="match_parent"
    android:layout_height="match_parent"
    android:orientation="vertical"
    android:padding="16dp">

    <LinearLayout
        android:layout_width="match_parent"
        android:layout_height="wrap_content"
        android:orientation="horizontal">

        <EditText
            android:id="@+id/editTextTask"
            android:layout_width="0dp"
            android:layout_height="wrap_content"
            android:layout_weight="1"
            android:hint="Enter a task" />

        <Button
            android:id="@+id/buttonAdd"
            android:layout_width="wrap_content"
            android:layout_height="wrap_content"
            android:text="Add" />
    </LinearLayout>

    <androidx.recyclerview.widget.RecyclerView
        android:id="@+id/recyclerViewTasks"
        android:layout_width="match_parent"
        android:layout_height="match_parent"
        android:layout_marginTop="16dp"/>
</LinearLayout>
2. TaskFragment.java
package com.example.week52026_recyclerview_room_fragment;

import android.os.Bundle;
import android.view.LayoutInflater;
import android.view.View;
import android.view.ViewGroup;
import android.widget.Button;
import android.widget.EditText;

import androidx.annotation.NonNull;
import androidx.annotation.Nullable;
import androidx.fragment.app.Fragment;
import androidx.lifecycle.Observer;
import androidx.recyclerview.widget.LinearLayoutManager;
import androidx.recyclerview.widget.RecyclerView;

import java.util.List;

public class TaskFragment extends Fragment {

    private AppDatabase database;
    private TaskAdapter adapter;

    @Nullable
    @Override
    public View onCreateView(@NonNull LayoutInflater inflater, @Nullable ViewGroup container, @Nullable Bundle savedInstanceState) {
        View view = inflater.inflate(R.layout.fragment_task, container, false);

        EditText editTextTask = view.findViewById(R.id.editTextTask);
        Button buttonAdd = view.findViewById(R.id.buttonAdd);
        RecyclerView recyclerView = view.findViewById(R.id.recyclerViewTasks);

        // Setup RecyclerView
        recyclerView.setLayoutManager(new LinearLayoutManager(getContext()));
        adapter = new TaskAdapter();
        recyclerView.setAdapter(adapter);

        // Initialize Room Database
        database = AppDatabase.getDatabase(getContext());

        // Observe Data from Room Database
        database.taskDao().getAllTasks().observe(getViewLifecycleOwner(), new Observer<List<Task>>() {
            @Override
            public void onChanged(List<Task> tasks) {
                adapter.setTasks(tasks); // Update UI automatically when DB changes
            }
        });

        // Add Button Click Listener
        buttonAdd.setOnClickListener(new View.OnClickListener() {
            @Override
            public void onClick(View v) {
                String taskName = editTextTask.getText().toString().trim();
                if (!taskName.isEmpty()) {
                    Task newTask = new Task(taskName);
                    // Insert to database on background thread
                    AppDatabase.databaseWriteExecutor.execute(() -> {
                        database.taskDao().insert(newTask);
                    });
                    editTextTask.setText("");
                }
            }
        });

        return view;
    }
}
Step 5: Updating MainActivity
1. activity_main.xml
Replace your current layout with a FragmentContainerView.
<?xml version="1.0" encoding="utf-8"?>
<androidx.constraintlayout.widget.ConstraintLayout xmlns:android="http://schemas.android.com/apk/res/android"
    xmlns:app="http://schemas.android.com/apk/res-auto"
    xmlns:tools="http://schemas.android.com/tools"
    android:id="@+id/main"
    android:layout_width="match_parent"
    android:layout_height="match_parent"
    tools:context=".MainActivity">

    <androidx.fragment.app.FragmentContainerView
        android:id="@+id/fragmentContainer"
        android:layout_width="match_parent"
        android:layout_height="match_parent"
        app:layout_constraintTop_toTopOf="parent"
        app:layout_constraintBottom_toBottomOf="parent"
        app:layout_constraintStart_toStartOf="parent"
        app:layout_constraintEnd_toEndOf="parent" />

</androidx.constraintlayout.widget.ConstraintLayout>
2. MainActivity.java
Load the Fragment in onCreate.
package com.example.week52026_recyclerview_room_fragment;

import android.os.Bundle;
import androidx.activity.EdgeToEdge;
import androidx.appcompat.app.AppCompatActivity;
import androidx.core.graphics.Insets;
import androidx.core.view.ViewCompat;
import androidx.core.view.WindowInsetsCompat;

public class MainActivity extends AppCompatActivity {

    @Override
    protected void onCreate(Bundle savedInstanceState) {
        super.onCreate(savedInstanceState);
        EdgeToEdge.enable(this);
        setContentView(R.layout.activity_main);

        ViewCompat.setOnApplyWindowInsetsListener(findViewById(R.id.main), (v, insets) -> {
            Insets systemBars = insets.getInsets(WindowInsetsCompat.Type.systemBars());
            v.setPadding(systemBars.left, systemBars.top, systemBars.right, systemBars.bottom);
            return insets;
        });

        // Load the fragment into the container if this is a fresh start
        if (savedInstanceState == null) {
            getSupportFragmentManager().beginTransaction()
                    .replace(R.id.fragmentContainer, new TaskFragment())
                    .commit();
        }
    }
}
Run the app and Try adding tasks.